
Seat Rails Reconditioning
By Larry Atkisson, Seattle
Remove the seat from the rails or seat and rails together. Disconnect rails from seat by remov-ing the 7/16 bolts from the front under the seat. To free up the travel simply spray a penetrating lubricant into the joint where the seat adjuster arm meets the slider. Don't over apply to the point where the lubricant will leak onto your carpet when you re-install the seat or move it.
Remove the seat from the rails or seat and rails together. Disconnect rails from seat by remov-ing the 7/16 bolts from the front under the seat. To free up the travel simply spray a penetrating lubricant into the joint where the seat adjuster arm meets the slider. Don't over apply to the point where the lubricant will leak onto your carpet when you re-install the seat or move it.
Remove the seat from the rails or seat and rails together. Disconnect rails from seat by removing the 7/16 bolts from the front under the seat. To free up the travel simply spray a penetrating lubricant into the joint where the seat adjuster arm meets the slider. Don't over apply to the point where the lubricant will leak onto your carpet when you re-install the seat or move it.
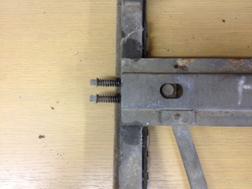
If you are removing the rails from the seat for reconditioning - The travel is limited by a rubber roller that comes up against a dimple in the bottom part of the rail. You do not need to re-move the adjuster arm. There are two parts that come apart. On each rail there is a mounting plate on the top and the bottom. In order to separate top from bottom, turn the unit upside down and drill out the dimples at the back (with a 3/16" bit), one on each side.
Turn the rails right side up and remove the remainder of the dimples you just drilled out, without enlarging the hole you drilled (it is important that you do not oversize the hole - it is suggested that you use a file rather than running a drill bit into the hole).
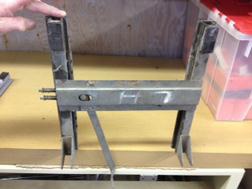
Stand the rails up with the front facing down (adjuster arm in a downward direction), drive the bottom mounting rail down separating the top (using a rubber or other soft material -do not use steel) from the bottom rail. |
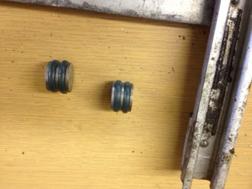
At this point the rubber lined roller wheels will be exposed. Try to do this with enough control that you don't have to chase the rollers around the garage.
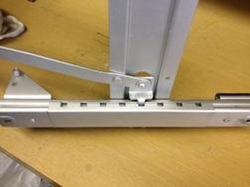
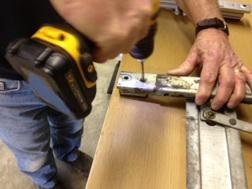
On the side that has the control arm, with the indexing on the rail, you pull the arm over so that the catch won't engage the rail when you move it. Drive the rail off as you did the other side. Make sure you keep track of which side the roller came from, so that you can re-install to the same location.
Remove the rubber pads at the rear of the rails. Be careful not to break off the little metal tabs as they become quite brittle if moved back and forth. If you still have the rubber cover on the handle end of the seat adjusting arm, remove that as well. There is no more dis-assembly required. Now you get into cleaning - sand blasting is the most effective way to get the desired level of cleaning. If you don't have a blaster available, a trip to a machine shop is well worth the time you will save doing the job with a wire wheel or brush. After stripping, you should wash with lacquer thinner or alcohol (denatured rather than what's left in your cupboard from the weekend). The reason for that is to remove any remaining cleaning material. Once dried, any good quality aerosol paint will do the job (choose your color wisely). Clean the rubber pads and rollers with a good quality cleaner. Apply a good quality lubricant (not grease - attracts dirt and causes the same problem you just fixed). Reassemble by reversing the procedure you followed above. Apply minimal lubricant in the track where the rollers go. Once assembled, you need to address the dimples you removed earlier. This done by in-stalling a 3/16" diameter pop rivet in each hole, from the bottom. Run the rails a few time (without pinching your fingers in the rails). Install the rails on the seat and install the seat in the car. Operate the seat back and forth to en-sure there is a full range of easy movement... You're done! |
